Cleaning Up Time Machine Local Snapshots
About a week ago my mac complained that it was running out of disk space. I deleted a bunch of old TV shows and GoPro videos and called it good. Today I went to do an external backup and saw that my drive was still full. Half an hour of investigation and I realized my 500 GB drive had 230 GB of local Time Machine backups. In fact, it was full enough that the Time Machine GUI wouldn’t start, I couldn’t run more backups, and several other basic utilities on my mac stopped working. It took about three hours of experimenting to get the backups under control and the disk back to 50% full. If you run into a similar situation here’s what worked for me.
tmutil
Before OS X High Sierra there was a command you could run, tmutil disablelocal that would turn off local snapshots. It was a fast way to stop time machine from continuing to fill the disk while you debugged another problem. The High Sierra version of tmutil doesn’t have this command, so I had to try something different. I found listlocalsnapshotdates useful for seeing the scope of the problem.
tmutil listlocalsnapshotdates /Volumes/com.apple.TimeMachine.localsnapshotsThat gives a list of the snapshots. My machine had 51 snapshots covering more than a month, with several days have eight or more snapshots. Once I had the list I started to delete the snapshots manually using this command:
tmutil deletelocalsnapshots YYYY-MM-DD-HHMMSSThe first couple deletes went well, but after that, they stopped working. More reading of man pages and I found the command thinlocalsnapshots. The man page isn’t very verbose for this command, so I had to experiment a bit to find something that worked. According to the documentation, this command tries to free up a specified number of bytes from a given Time Machine mount. There’s also an optional urgency parameter which is a value between 1 and 4. I tried the first run with urgency 4 and found it took a long time and only thinned one snapshot. When I specified an urgency of 1, it freed the specified amount of space quickly.
tmutil thinlocalsnapshots /Volumes/com.apple.TimeMachine.localsnapshots 20000000000 1After running this command and doing a couple of the steps in the next section, my disk was back to a more reasonable 57% full. Once there was space available, I was able to run a Time Machine backup to an external disk. That, in turn, cleaned up a few more local snapshots.
Once the backup finished, I verified that I could start Time Machine and restore files once again. If you end up having to go down this path be aware that the first backup after your cleanup will probably take longer than usual. The documentation I could find on forums leads me to believe that the local snapshots are used to increase the speed of Time Machine’s preparation step. My first backup after fixing took nearly three hours (and copied 32 GB of data).
I also found it helpful to disable automatic backups in the Time Machine UI while I was cleaning things up so that Time Machine wasn’t writing new snapshots as I deleted the old ones.
Other Tools
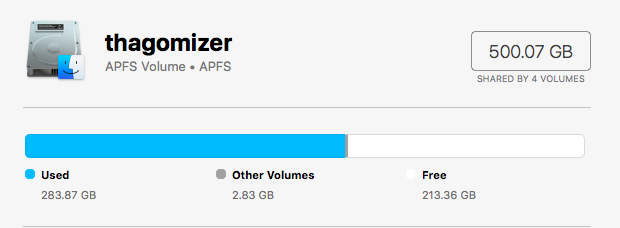
I had to use a couple of tools to figure out that Time Machine local snapshots were using all the available disk space on my mac. The tools that OS X shows you when it warns you that you are low on disk space don’t make it clear what is going on. I saw that I had 220 GB of “purgeable” data (the backups), but I couldn’t figure out how to purge that data. In the end, a combination of the Unix utility df, realizing that the backups were in their own directory under \Volumes, and OmniDiskSweeper made me aware that I only had about 250 GB of real data and the rest was deletable backups.
While solving the “disk full” problem, I realized I needed to update my Time Machine exclusions. I had about 40 GB of GoPro videos and screencasts that I was mistakenly including in my Time Machine backups. You can edit your exclusions under Time Machine options in the GUI. I added all the folders that don’t change often and are primarily media and that should help prevent this situation in the future.
While I’ve decided it doesn’t make sense for me to backup my media via Time Machine, I do want to have it backed up somewhere offsite. I work at Google, so for me, the obvious solution was to use a Google Cloud Storage Bucket. I created a bucket that uses one of the lower priced and lower availability storage classes. It doesn’t make sense to pay for frequent read access to my backups. Once the bucket was set up, I wrote a simple bash script to use gsutil rsync to sync my media folders to GCS on a regular schedule. This doesn’t give me the versioning that I get with Time Machine, but it does give me offsite backups of my photos and other media files.
The result of several hours of work is that my disk is no longer full, my backups are in a much better place now than they were yesterday, and my backup strategy includes offsite backups of both my personal files and my media. Now I just need to add regular checks to ensure that I can still restore and I’ll be all set.
I want to thank Ryan Davis for helping me find the folders that contained media files that should be excluded from Time Machine and old mobile device backups that I could safely delete.